- For the in-game script of this generation, see Script - Generation 1: Advent of the Goddess.
- For a summary of the story, see Mabinogi Storyline Recap#Generation 1: Advent of the Goddess.
Generation 2: Paladin >

|
This article contains spoilers.
If you do not wish to read further, please return to the home page.
|

|
|
- To start Generation 1, you must be Level 5 and you must have completed your Beginner Quests.
- Characters made before June 16th 2016 will have to complete the original Beginner Quests, while all new characters made after June 16th 2016 will have to complete the Lorna and Pan Beginner Quests and finish the Strange Signs quest.
- An assisting Human player cannot transform into their Paladin or Dark Knight form in most dungeons, but an Elf/Giant may use Falcon/Beast.
- You may remove G1 as a requirement to start later generations by talking to Duncan if your total level is over 100, but this does not complete G1, you will still need to complete it later if you want to obtain any rewards.
- Rewards:
- Total AP: 74
- Total EXP: 202,605
- Total Gold: 54,550
- If you are undergoing a Generation Replay, only the items given as part of the questline will be rewarded to you. Experience, potions, and gold will not be given again.
- As the generation involves a lot of travel from point A to B, even if you are provided Red Wings of a Goddess to help you, it is recommended to be aware of Fast Travel methods in order to save time.
|
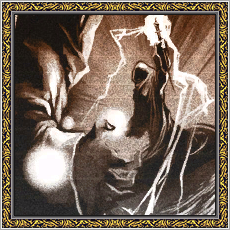
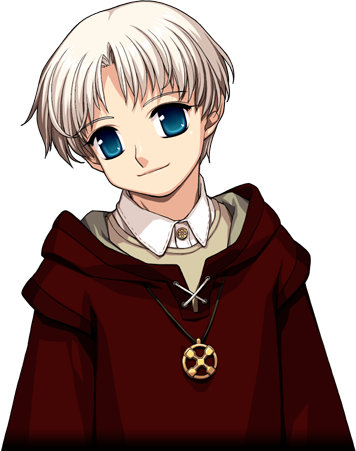
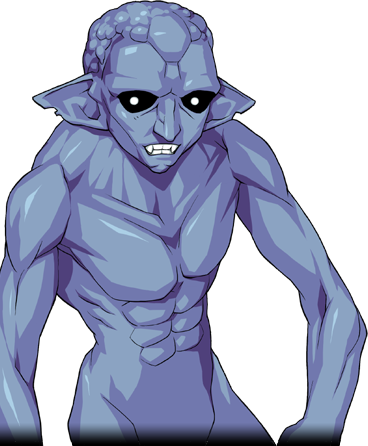
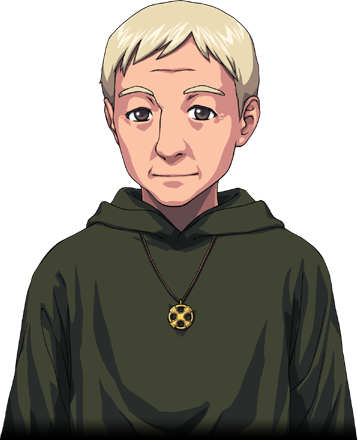
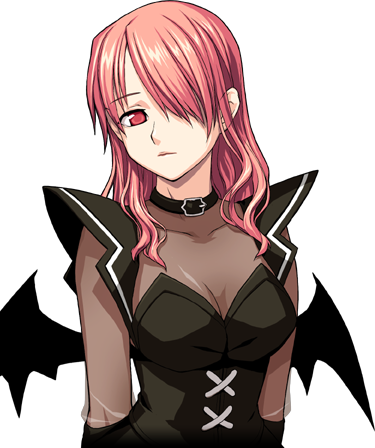
Generation 1: Advent of the Goddess, also known as The Advent of Morrighan, is the beginning of Chapter 1 and of Mabinogi: Fantasy Life. A character known as the Milletian descends into the world of Erinn and its first continent, Uladh. There, the Milletian meets a tribe of Humans known as the Tuatha de Danann who constantly combat monsters known as the Fomorian. As the plot unravels, a plane known as Tir Na Nog is uncovered. Mainly, the story revolves around the Goddess Morrighan, however the sinister Fomorian God known as Cichol has other plans for Humanity's Goddess.
Changes in Generation 1 Due to Updates
- You cannot skip Generation 1. Furthermore you must complete Generations 1 through 3 in order to proceed into later generations.
- Elves and Giants can now perform Generation 1.
- Time restrictions were removed and Gold/EXP rewards were adjusted.
- AP will be given throughout Generation 1's quests (total of 71).
- Generations 1, 2 and 3 can be completed or restarted by speaking with the Lorna NPC in any town.
- Players who are still performing Generation 1 will be able to continue with the normal version if they wish to do so, however they will be unable to proceed with the new version of these Generations.
- Players who have already finished Generation 1 may redo the new version.
- Players will not lose their Transformation if they decide to redo them.
- Transformation restrictions in certain dungeons still apply.
- All quests will automatically complete on their own, with the exception of Final Dance.
- Waiting time between all quests has been either removed or reduced.
- Relogging/Changing-Channels is not required to view cutscenes. Instead, they come at specific times.
- Any keywords obtained in this Generation are not directly used. Instead they are quest objectives and some can only be used to recover quest items lost due to disconnection during RPs.
- Completing a dungeon quest requirement with multiple people needing the requirement will clear the quest for everyone.
- All RP Dungeons are now soloable, which turns you into a specific NPC depending on the dungeon.
- All RP NPCs have a certain amount of Movement Speed Potions.
- You no longer have to gift the Bear (NPC) Mana Herbs. Instead, talk to it with the Herbs in your inventory.
- Adventurer's Crux Armor is rewarded upon completion of The Land of Eternity, Tir Na Nog.
- Brown Fomor Barri is now 1 floor with a similar length to Alby Normal. Spawns are significantly reduced.
- The Fomor Medal no longer requires talking to Endelyon.
- You no longer have to run Ciar Dungeon for One Who Speaks Fomor, nor acquire Goro's Ring.
- Dul Brau Dairam Shanon's Rabbie Dungeon is now drastically shorter; approximately 1 floor about the length of Alby Normal.
- Mores now has Rank 1 Fireball and is equipped with Fire Wand. Chain Casting can be done with Fireball.
- Holy Water of Lymilark is no longer required for Get Meven's item.
- The Wizard's Note dungeon for Ciar in Find the Book of Revenge, Vol. II no longer allows a party.
- You no longer need to give Sion's Present to Sion in Find the Book of Revenge, Vol. III.
- Mari possesses the "original" version of Arrow Revolver instead of the prototype.
- You are no longer required to perform Kristell's series of requests in order to obtain a Black Fomor Pass.
- In addition, the current level requirements to obtain a Black Fomor Pass have been removed.
- You are no longer required to wait until Samhain to break the seal to Tir Chonaill (Another World).
- Only 1 Zombie is needed to be slain for Tir Na Nog.
- Only Albey Green Gem needs to be done to obtain the Black Orb.
- The number of rooms in the Final Dungeon was shortened by approximately half, is now five floors long instead of six, and the spawns were significantly reduced.
- The storyline can now be replayed after completion.
- This can only be done in parts, however.
- For example, playing Tale of the Three Warriors completes after the quest Tale of the Three Missing Warriors is completed; you will not proceed into later parts of the story.
- This is similar to how Saga works.
- When replaying Generation 1, quests appear in the Replay tab instead of the Advent tab.
- Korean voiceovers have been added for NPCs during Generation 1.
- Generation Quests now begin in sequential order. New quests will now be obtained without delay after clearing the previous quest.
- Talking to Tarlach as a bear in the daytime will offer a Wait until nighttime option, placing the player in a Shadow Mission in order to speak to Tarlach immediately.
- This Tarlach will not have any other keyword responses than the ones for the quest currently undergoing.
- RP missions throughout Chapter 1 quests have been shortened, and movement speed for these missions has been increased by 40%
- The length of all RP dungeons has been significantly shortened.
- Some RP mission characters will be improved to move faster than before.
- The Midday Sidhe Sneachta mission has been added, allowing you to meet NPC Bearlach even at night.
- You can enter by talking to NPC Tarlach in Sidhe Sneachta at night and selecting Wait until Daytime.
- The quest information window has been improved visually and the quest window for Storyline, part-time jobs, and general quests is larger.
- The objective description of each mainstream quest will be supplemented, and if a more detailed explanation is needed, an objective progress description has been added.
NPCs involved in Advent of the Goddess
NPCs involved in Advent of the Goddess
[show]
Tale of the Three Warriors
The Snowy Hills of Sidhe Sneachta
 
|
Name
|
The Snowy Hills of Sidhe Sneachta
|
NPC
|
Duncan
|
| Information
|
You will find the road to Sidhe Sneachta ont he way to Alby Dungeon, north of town. An earring was lost while making a snowman. Can you look for it? - Duncan
|
| Instruction
|
- Upon logging in, you will see a cutscene, then receive a quest.
- Find the Lost Earring in Sidhe Sneachta.
- In Sidhe Sneachta, hit the snowman with a glowing spot.
- The quest will not complete if you already have the earring; You need to hit the snowman, regardless if you pick the earring or not.
- Deliver the Lost Earring to Duncan.
- If you have multiple copies of the earring, they all vanish together from your inventory.
- You will be awarded 1,500 EXP, 1,700 Gold, 8 Mana Herbs, and 2 AP for completing the quest.
|
Give the Mana Herb to the bear.


|
Name
|
Give the Mana Herb to the bear.
|
NPC
|
Bear (NPC)
|
| Information
|
If you go to the field north of Sidhe Sneachta, you'll find an unusually-shaped altar. I hear there's a big bear gathering Mana Herbs there. Why don't you go and give it some Mana Herbs as a gift? - Duncan
|
| Instruction
|
- Deliver 5 Mana Herbs to the Bear in Sidhe Sneachta.
- You will receive the Tarlach Keyword.
- The Bear only appears during daylight hours (6:00AM to 6:00PM or 6:00 to 18:00).
- If you are attempting to enter the northern part of Sidhe Sneachta at night, you will be unable to enter until it is daytime. This only happens if you are on this quest for the first time(?)
- You will be awarded 2,200 EXP for completing the quest.
|
Talk to Duncan.

|
Name
|
Talk to Duncan.
|
NPC
|
Duncan
|
| Information
|
Ask Duncan about this Tarlach.
|
| Instruction
|
- Talk to Duncan in Tir Chonaill.
- You will be awarded 2,300 EXP for completing the quest.
|
The Three Missing Warriors
|
Name
|
The Three Missing Warriors
|
NPC
|
Stewart
Tarlach
Mari
Ruairi
Duncan
|
| Information
|
The three missing warriors... I think Stewart from the Dunbarton Magic School should be able to tell you more. Why don't you go talk to him?
|
| Instruction
|
- Talk to Stewart in Dunbarton School.
- Offer Tarlach's Locket to the Alby Dungeon and clear the RP Dungeon.
- Two other people may join, although soloing is possible.
- The Party Leader will role-play as Tarlach, while the other two will RP as Mari and Ruairi. If the dungeon is soloed, you will role-play Ruairi instead.
- The dungeon contains Alby Normal spawns and is a few rooms long.
- If the RP somehow fails, or if you lose the Memory Cipher, you can speak with Stewart using the keyword to receive the item again.
- Upon clearing the RP dungeon, you will obtain the Goddess Morrighan Keyword.
- All players on this quest will fulfill the requirement if they are required to do the Role-Play Dungeon.
- Talk to Chief Duncan in Tir Chonaill about the Goddess.
- You will be awarded 12,000 EXP for completing the quest.
|
Story of the Goddess
The Story of the Goddess
The Land of Eternity, Tir Na Nog

|
Name
|
The Land of Eternity,
Tir Na Nog
|
NPC
|
Aeira
|
| Information
|
Go to Aeira at the Dunbarton Bookstore and read about Tir Na Nog. I think that should be good enough to satisfy your curiosity... - Tarlach
|
| Instruction
|
- Wait for the quest to arrive.
- Obtain The Land of Eternity, Tir Na Nog from Aeira at the Dunbarton Bookstore.
- You will be awarded 1,100 EXP and 2 AP for completing the quest.
|
Paradise
|
Name
|
Paradise
|
NPC
|
Tarlach
|
| Information
|
Investigate the "paradise" that you read about in The Land of Eternity, Tir Na Nog.
|
| Instruction
|
- Read The Land of Eternity, Tir Na Nog.
- Take the book to Tarlach in Sidhe Sneachta.
- Clear Barri Dungeon in Bangor using the Brown Fomor Pass. For information on the dungeon, click here.
- If you lose the pass, talk to Tarlach using the "Paradise" keyword to receive the item again.
- Two other players may join.
- It is recommended to draw out the Wisps individually then draw them out from the boss room. Defeat the Wisps as quickly as possible, especially if you are soloing.
- The Black Wizard has a rather large radius of detection. Be wary of the distance between you and the Black Wizard.
- The Fomor Medal Keyword is given upon defeating the boss. The Fomor Medal will also be deposited in your inventory.
- You will be awarded 5,550 EXP and 2 AP for completing the quest.
|
Fomor Medal
The Fomor Medal

|
Name
|
Fomor Medal
|
NPC
|
Comgan
Kristell
Meven
|
| Information
|
You're curious about the Fomor Medal? Come speak to me, the priest of Bangor. I'll tell you more. - Comgan
|
| Instruction
|
- Ask Comgan, the priest of Bangor.
- Ask Kristell, the priestess of Dunbarton.
- Talk to Meven inside the Tir Chonaill church.
- You will be awarded 2,250 EXP and 2 AP for completing the quest.
|
One Who Speaks Fomor
Dul Brau Dairam Shanon
Dul Brau Dairam Shanon
 
|
Name
|
Dul Brau Dairam Shanon
|
NPC
|
Kristell
Tarlach
|
| Information
|
I hear a traitor succubus is living in Dunbarton. I'm sure she's well-versed in the language of the Fomor. - Goro
|
| Instruction
|
- Talk to Kristell at the Dunbarton Church.
- Offer Tarlach's Glasses Pouch to the Rabbie dungeon and clear the RP Dungeon.
- Talk to Kristell at the Dunbarton Church.
- Talk to Tarlach at Sidhe Sneachta.
- You will be awarded 3,250 EXP, 9700 Gold, and 3 AP for completing the quest.
|
Request to have the Fomor book translated.
|
Name
|
Request to have the Fomor book translated.
|
NPC
|
Kristell
|
| Information
|
Although I've had this book for a long time, I can't read a single line. Please ask Kristell to translate it. - Tarlach
|
| Instruction
|
- Ask Kristell at the Dunbarton Church to translate the Fomor book.
- You will be awarded 1,750 EXP, 2,000 Gold, and 3 AP for completing the quest.
|
Fomor Book Translated

|
Name
|
Fomor Book Translated
|
NPC
|
Kristell
Tarlach
Meven
|
| Information
|
I finished translating the Fomor book. Come by and I'll give you a copy. - Kristell
|
| Instruction
|
- Receive a translated copy of the Fomor book from Kristell at the Dunbarton Church
- You may want to use the Moon Gates in order to get from Dunbarton to Northern Sidhe Snachta.
- Talk to Tarlach in Sidhe Sneachta.
- Talk to Meven inside the Tir Chonaill Church.
- You will be awarded 3,900 EXP, 5,440 Gold and 3 AP for completing the quest.
|
Get Meven's item.
Mores
Mores
|
Name
|
Mores
|
NPC
|
Duncan
Tarlach
Eavan
|
| Information
|
Try to find a clue in the translated book. If you wish to obtain the memorial item again, use the keyword on the NPC.
|
| Instruction
|
- Read the translated book.
- Talk to Duncan at Tir Chonaill.
- Deliver the book to Tarlach at Sidhe Sneachta.
- Talk to Eavan at the Dunbarton Town Office.
- Talk to Kristell at the Dunbarton Church.
- You will be awarded 6,300 EXP, 2500 Gold, and 3 AP for completing the quest.
|
Clear Math Dungeon.
|
Name
|
Clear Math Dungeon.
|
NPC
|
Mores
|
| Information
|
You'll find an item that was lost by the author in the Dunbarton Town Office. It seems like a Memory Cipher, so why don't you try using it in Math Dungeon? - Kristell
|
| Instruction
|
- Offer the Broken Torque onto the altar of Math Dungeon and clear the RP dungeon. For more information on the dungeon, click here
- Should you lose the torque in any way for whatever reason, simply go back to Kristell and speak to her with Mores' Lost Property Keyword.
- You will RP as Mores. He is an incredibly powerful Druid with Rank 1 of Icebolt, Firebolt, Lightning Bolt, and Fireball. In addition, he has the ability to Chain Cast all four spells. Be aware that despite being a powerful character, careless play can still result in failure.
- Lightning Bolt can be very useful for clearing rooms quickly, as well as hitting Mimics as long as there are other enemies nearby.
- Fireball can only be cast with a Fire Wand, which Mores has equipped. Although it takes 4 seconds to cast and 3 seconds to impact, it can annihilate most of the room in one hit.
- Boss is 6 Ghost Armors; only 3 need to be defeated to view the cutscene that will end the RP. The Morrighan's Revenge Keyword will also be given.
- You will be awarded 6,300 EXP and 3 AP for completing the quest.
|
Goddess Morrighan
 
|
Name
|
Goddess Morrighan
|
NPC
|
Kristell
Duncan
|
| Information
|
Learn what Mores has been through.
|
| Instruction
|
- Talk to Kristell at the Dunbarton Church.
- Talk to Duncan at Tir Chonaill.
- You will be awarded 6,130 EXP, 2,250 Gold and 3 AP for completing the quest.
|
Get the Book of Revenge back.

|
Name
|
Get the Book of Revenge back.
|
NPC
|
Tarlach
Duncan
Kristell
|
| Information
|
I'd like to read this Book of Revenge. Would you borrow it from Tarlach on my behalf? - Duncan
|
| Instruction
|
- Get the The Book of Revenge borrowed by Tarlach at Sidhe Sneachta.
- Show the Book of Revenge to Chief Duncan in Tir Chonaill.
- He will take the book from you.
- Ask Kristell in the Dunbarton Church about the book that follows the Book of Revenge.
- Visit Aeira in the Dunbarton Bookstore.
- You will be awarded 3,900 EXP, 8,500 Gold and 3 AP for completing the quest.
|
Find the Book of Revenge
The Book of Revenge, Volume II
|
|
Name
|
The Book of Revenge, Volume II
|
NPC
|
Aeira
|
| Information
|
You found out that the Book of Revenge, Vol. II was seen somewhere in Ciar Dungeon. After getting the original book written in the language of the Fomor, ask Kristell to translate it.
|
| Instruction
|
- Wait for the quest to arrive.
- Meet Aeira at the Dunbarton Bookstore.
- You will be awarded 3,900 EXP, 2 AP, a Wizard's Note and a Red Wings of a Goddess to Ciar Dungeon for completing the quest.
|
Find the Book of Revenge, Vol. II
|
Name
|
Find the Book of Revenge, Vol. II
|
NPC
|
Kristell
|
| Information
|
You found out that the Book of Revenge, Vol. II was seen somewhere in Ciar Dungeon. After getting the original book written in the language of the Fomor, ask Kristell to translate it.
|
| Instruction
|
- Clear Ciar Dungeon using the Wizard's Note.
- The dungeon resembles Ciar Normal, and only has one floor.
- The Book of Revenge, Vol. 2 will be put in your inventory after the boss room is cleared.
- Important Note: For the dungeon to be counted as "completed," the player must exit to the dungeon lobby through the statue in the reward room.
- If you fail to finish the dungeon, you can go to Aeira and get another Wizard's Note by talking to her with the Wizard Note keyword.
- Take the book to Kristell at the Dunbarton Church.
- You will be awarded 9,900 EXP, 9,700 gold and 1 AP for completing the quest.
|
Receive the Book of Revenge, Vol. II

|
Name
|
Receive the Book of Revenge, Vol. II
|
NPC
|
Kristell
Duncan
Aeira
|
| Information
|
I finished the Book of Revenve, Vol II. I'll be waiting at Dunbarton Church. - Kristell
|
| Instruction
|
- Wait for the quest to arrive.
- Take the book to Kristell at the Dunbarton Church.
- Show Chief Duncan the translated copy.
- He will take the book from you.
- Perhaps Aeira knows where the third volume is.
- You will be awarded 7,200 EXP, 1,700 Gold and 2 AP for completing the quest.
|
Find the Book of Revenge, Vol. III
|
Name
|
Find the Book of Revenge, Vol. III
|
NPC
|
Aeira
|
| Information
|
I heard about the Book of Revenge, Vol. III. Come to the Dunbarton Bookstore immediately. - Aeira
|
| Instruction
|
- Find out what Aeira at the Dunbarton Bookstore discovered.
- Ask Lassar in Tir Chonaill for the book.
- Meet Seumas at the Dragon Ruins and ask him about the book.
- Ask Kristell at the Dunbarton Church to translate the Book of Revenge, Vol. III.
- You will be awarded 7,500 EXP, 8,500 Gold and 2 AP for completing the quest.
|
Receive the Book of Revenge, Vol. III
|
Name
|
Receive the Book of Revenge, Vol. III
|
NPC
|
Kristell
Duncan
|
| Information
|
The translation of the Book of Revenge, Vol. III is finished. I will be waiting at the Dunbarton Church. - Kristell
|
| Instruction
|
- Receive the translated copy from Kristell at the Dunbarton Church.
- Show Chief Duncan of Tir Chonaill the translated copy.
- Talk with Bryce in Bangor.
- You will be awarded 2,000 EXP, 6700 Gold and 2 AP for completing the quest.
|
Glas Ghaibhleann
Glas Ghaibhleann's Bones
|
|
Name
|
Glas Ghaibhleann's Bones
|
NPC
|
Tarlach
|
| Information
|
We can learn about Glas Ghaibleann in an old memory. - Tarlach
|
| Instruction
|
- Talk with Tarlach at Sidhe Sneachta.
- You will be awarded 3,800 EXP, 1,260 Gold and 3 AP for completing the quest.
|
Obtain the Magic Powder of Preservation.

|
Name
|
Obtain the Magic Powder of Preservation.
|
NPC
|
Tarlach
|
| Information
|
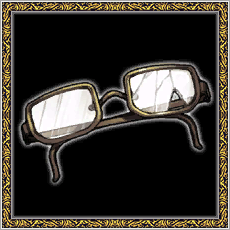
Please get the Magic Powder of Preservation fom the Fiodh Dungeon. I will enchant my glasses with it and give them to you. - Tarlach
|
| Instruction
|
- Get the Magic Powder of Preservation from Fiodh Dungeon and give it to Tarlach.
- You will receive Tarlach's Fiodh Pass. Up to 4 players may enter the dungeon.
- It is similar to Fiodh Normal, although the spawns are reduced and is only a few rooms long.
- This dungeon has a lot of forestry, as well as grass to obstruct your view. The use of CtrlTargeting and disabling Film Post-Shader is recommended.
- While the dungeon itself is fairly short, the monsters in the Boss room boast high damage and HP; it is recommended to bring a party with you.
- The Magic Powder of Preservation will be given to you directly after clearing the Boss Room.
- Multiple players doing the same quest can obtain the Magic Powder of Preservation without having to repeat the dungeon.
- Talk to Tarlach. He will take the Magic Powder.
- You will be awarded 2,750 EXP, 6,500 Gold, 4 AP, Tarlach's Preserved Broken Glasses and a Red Wings of a Goddess to Rabbie Dungeon for completing the quest.
|
Clear Rabbie Dungeon.
|
Name
|
Clear Rabbie Dungeon.
|
NPC
|
Tarlach
Mari
Ruairi
|
| Information
|
Thanks to the Magic Powder of Preservation you brought, I can finally create a Memory Cipher with my memories. Just offer these Broken Glasses at the Rabbie Dungeon Altar... I think you might be able to understand me better. - Tarlach
|
| Instruction
|
- Offer Tarlach's Preserved Broken Glasses to Rabbie Dungeon and clear the RP dungeon. For information on the dungeon, click here.
- You will be awarded 6,300 EXP and 2,500 Gold for completing the quest.
|
Morrighan's Betrayal
Duncan's Call

|
Name
|
Duncan's Call
|
NPC
|
Duncan
Shiela
Mores
Tarlach
|
| Information
|
...There's something I'd like to give you. Please come to my house in Tir Chonaill. Hurry. - Duncan
|
| Instruction
|
- Upon starting the quest, you will see a cutscene.
- Meet Chief Duncan in Tir Chonaill.
- Offer the Broken Torque to Math Dungeon and clear the RP dungeon.
- The Party Leader will role-play as Shiela, while the Party Mate becomes Mores. If the dungeon is soloed, you will become Mores.
- This dungeon is almost the same as Clear Math Dungeon. Only it will be from Shiela's point of view. The dungeon tactics used in the previous iteration will work just as effectively.
- Mores must do all the fighting, as Shiela is extremely weak.
- Despite being an incorporeal ghost, Shiela is still a regular character and can be harmed by enemies.
- If you lose the torque, talk to Eavan with the "Broken Torque" keyword to receive another one.
- You will receive the Cichol Keyword upon completion of the RP.
- Meet Chief Duncan of Tir Chonaill.
- Talk to Tarlach at Sidhe Sneachta.
- You will be awarded 9,900 EXP, 9,700 Gold and 2 AP for completing the quest.
|
Tir Na Nog
Duncan's Urgent Call

|
Name
|
Duncan's Urgent Call
|
NPC
|
Duncan
Kristell
|
| Information
|
...There's something about Glas Ghaibleann I'd like to tell you. Please come to my house in Tir Chonaill. Hurry. - Duncan
|
| Instruction
|
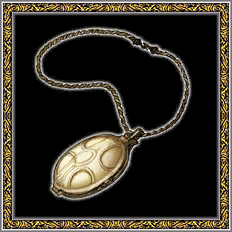
- Wait for about one minute and a cutscene will occur. You will receive the Goddess' Request Keyword and a Pendant of the Goddess.
- Meet Chief Duncan of Tir Chonaill.
- Talk to Kristell at the Dunbarton Church.
- You will be awarded 3,750 EXP, 3,400 gold and 2 AP for completing the quest.
- A cutscene will occur shortly afterwards.
|
Tir Na Nog
|
Name
|
Tir Na Nog
|
NPC
|
Dougal
|
| Information
|
You can use the Black Fomor Pass to reach Tir Na Nog from Barri Dungeon. Ask me again if you lose the pass. - Kristell
|
| Instruction
|
- Shortly after receiving this quest, you will see a cutscene.
- After arriving in Tir Na Nog through Barri Dungeon, look for the villagers
- Drop the Black Fomor Pass on the altar of Barri Dungeon. For more information on the dungeon, click here
- Defeat monsters in the boss room and open the door in the end chamber contain the Crossroads Gateway.
- To break the seal, click on the side statues of the gateway.
- If you lost the Black Fomor Pass and need another one, you may receive another one by talking to Kristell using the "How to Reach to Tir Na Nog" keyword.
- Take the portal connecting Erinn and Another World. All players will receive the "Seal Breaker of Another World" Title, regardless if they are on this quest or not.
- You will be entering an alternate plane of Erinn. In this world, you will be unable to get up with the help of Nao. Furthermore, you will not be able to get up at dungeon statues in this alternative plane. Having friends or people in your party when running the dungeons in this place is highly recommended.
- You may not resurrect on the spot while exploring Another World until you complete the quest.
- There are no healers or repairers.
- Dougal sells Health/Stamina Potions, Bandages and Phoenix Feathers
- Arrows cannot be purchased. However, Dingos found around Another World drop arrows frequently.
- In order to return to Another World, you must repeat the special Barri Dungeon. Alternatively, if you have a Warp Imp or the Recall Book, set the Save Location within Another World, then use Pet Teleport/The teleport function of the book.
- Talk to Dougal located at the House.
- Defeat 1 Zombie in the the Graveyard.
- Zombies are immune to Magic and Ranged attacks.
- Report the results to Dougal.
- You will be awarded 11,000 EXP, 6,240 Gold, 4 AP, a Small Green Gem and 5 Full Recovery Potion for completing the quest.
|
Find the Black Orb.

|
Name
|
Find the Black Orb.
|
NPC
|
Dougal
|
| Information
|
If you offer a Green Gem at Albey Dungeon Altar, you can go where a Black Orb is sealed. Destroy the pillar in the reward room at the end of the dungeon and bring back the Black Orb. That Black Orb is the key to a place where the power of the Fomor is sealed... It is also the key that will reveal my true identity. - Dougal
|
| Instruction
|
- Use the Small Green Gem to collect the Black Orb at Albey Dungeon. For information on the dungeon, click here.
- Albey Dungeon is located north of Dougal's position.
- You may bring up to 7 other players.
- Every player must clear the Black Orb Dungeon with their own Black Orb.
- Strike the Black Orb Pillar at the reward chamber five times to obtain the Black Orb. It will drop by your feet.
- The Black Orb can only be picked up by the player who landed the fifth hit. It is tradeable.
- However, whoever gets the fifth strike on the Black Orb Pillar will fulfill their Quest Requirement, if they have the quest.
- You must re-run the dungeon and be the one to make the fifth strike on the Black Orb Pillar if you wish to fulfill your own quest requirement.
- Warning: If a Pet accomplishes this, no one can obtain the Black Orb, and therefore the dungeon must be re-run.
- Use the Black Orb to get to Albey Dungeon and clear it. For information on the dungeon, click here.
- You may bring two other players to assist you.
- Defeat the boss. A cutscene will occur, and all members will be removed from the dungeon. You will obtain the Glas Ghaibhleann's Rebirth Keyword.
- After clearing the Black Orb dungeon, all dungeons in Albey will become darker, and there will be endless rain in Another World until the player finishes the final dungeon.
- If for some reason the dungeon must be reentered, the Black Orb must reobtained.
- You may hit signpots in the town until you obtain more Small Green Gems.
- If all the people in the party are knocked unconscious, an Advanced Phoenix Feather is the only way to continue the dungeon.
- Visit Dougal.
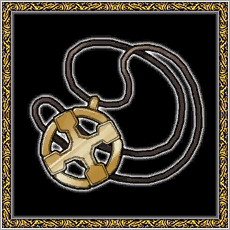
- Give Dougal the Pendant of the Goddess and have the pattern engraved.
- You will be awarded 61,100 EXP, 12,500 Gold, and 4 AP for completing the quest.
|
The Final Stand
Final Dance
 
|
Name
|
Final Dance
|
NPC
|
Dougal, Morrighan, Mores, Cichol, Morgant
|
| Information
|
Since you rescued the Goddess, I might just take a chance on you. Just offer this pendant inscribed with my pattern in Albey Dungeon. If you can manage to defeat my physical body... I ccan finally return to where I came from. - Dougal
|
| Instruction
|
- All players on this quest will finish it simultaneously.
- Offer the Pendant of the Goddess (Bind) on Albey Dungeon's Altar and stop Glas Ghaibleann. For more information on the dungeon, click here.
- This is the final dungeon. Please prepare yourself accordingly before entering.
- While the dungeon is short, you may want to stock up on items, such as Potions, Bandages, and Phoenix Feathers. You may also want to find someone who is experienced in running this dungeon to deal with the boss.
- Two other players may join and assist you.
- In front of the boss room, you will find a Goddess Pass in a treasure chest, which will allow you return to the boss room if you wish to finish the dungeon later. If you use the pass, you will find a treasure chest with a replacement pass upon entering.
- Note: If you lose the Goddess Pass for any reason, you will have to do the entire dungeon again from the beginning.
- After completing Generation 1, the pass will become unusable.
- If you fail the dungeon before obtaining the Goddess Pass, talk to Dougal with the keyword Glas Ghaibhleann's Rebirth to receive the Pendant of the Goddess (Bind) again.
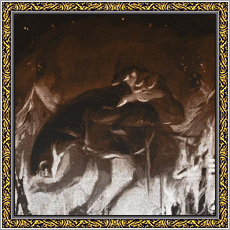
- After defeating the Dark Lord, a cutscene will play and the final battle with Glas Ghaibhleann will begin.
- After the defeat of Glas Ghaibhleann, Generation 1 will be complete. The Knight of Light Keyword, the title "who Saved the Goddess" and the Enchant Goddess's are also rewarded.
- All party members will return to Tir Chonaill after the credit roll. If a member does not wish to leave Another World, he/she must forcefully quit the game during the ending cutscene.
- To forcefully quit the game, access the computer's Windows Task Manager (Ctrl + Shift /Alt + Delete , then choose Task Manager.). Load expanded view using the dropdown, go into the "Details" tab, click "Client.exe" and finally, click End Process.
- You will be awarded 106,600 EXP, 12,500 Gold, and 6 AP for completing the quest.
- Completing the quest will automatically trigger Generation 2's opening cutscene.
|
[show] Game Scripts Game Scripts |
|---|
|
| Chapter 1 | | | | Chapter 2 | | | | Chapter 3 | | | | Chapter 4 | | | | Chapter 5 | | | | Chapter 6 | | | | Chapter 7 | | | | Arcana | | | | Chapter 8 | | | | Event | | | | Other | |
|
|


.png)


