- For the in-game script of this Generation, see Script - Generation 10: Goddess of Light.
< Generation 9: Alchemist Generation 11: Sword of the Gods >

|
This article contains spoilers.
If you do not wish to read further, please return to the home page.
|

|
- To start Generation 10, you must have completed Generation 9 or get your cumulative level to 320 and talk to Duncan.
|
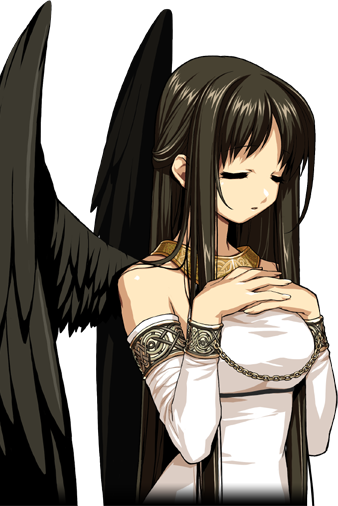
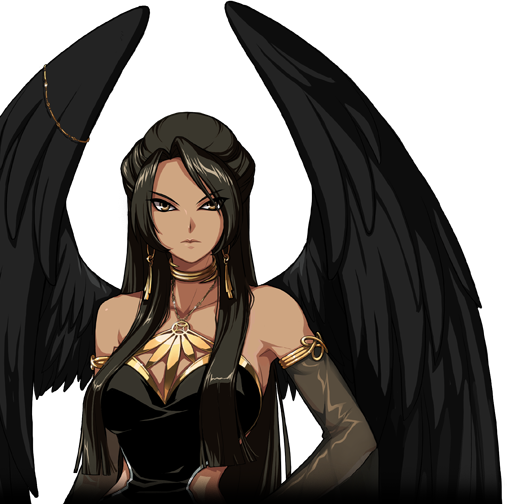
Generation 10: Goddess of Light is the second part of Chapter 3. The long forgotten Goddess of Light, Neamhain returns from hiding, but the Fomorians have a sinister plot that involves the goddess.
Changes in Generation 10 Due to Updates
NPCs involved in Goddess of Light
NPCs involved in Goddess of Light
Tips on Fast Travel
- Always use Blue Wings of Goddess for their intended purpose.
- Each time you are given a Shadow Mission or objective in a Uladh dungeon, use the Dungeon Guide to select either a Taillteann mission, Tara mission, or the requested Dungeon, then press the Move to Dungeon button to teleport there quickly.
- The first and easiest Tara Shadow Mission to click on in the Dungeon Guide is Shadow Realm Champion.
- The first and easiest Taillteann Shadow Mission to click on in the Dungeon Guide is Let Them Fight.
- If you need to speak to Padan, teleport using a Tara Shadow Mission in the Dungeon Guide.
- It is helpful to configure a hotkey for opening the Dungeon Guide. You may use it frequently.
- See Fast Travel for more information on fast travel.
Padan's Call


|
Name
|
Padan's Call
|
NPC
|
Padan
|
| Information
|
The Tara Royal Guard is searching for the Shadow Hero. -Padan
|
| Instruction
|
- Upon completion of G9, log-out or change channels to view the beginning cutscene. After the cutscene, wait for an owl to bring the quest.
- Talk to Padan in Tara. He is located near the Shadow Mission board nearby Tara's Stonehenge.
- Complete the Tara shadow mission, Survivor Rescue. You may bring a Royal Alchemist to assist you.
- You will start north of Tara. Move south into the city.
- There are two Shadow Ghosts in front of Tara's gate. It is not necessary to defeat them.
- Passing Tara's gate, you will encounter a group of 6 enemies surrounding a soldier: Bone Lancer and Bone Archer. The soldier is stationary and will not engage in combat.
- Defeat the enemies to complete the mission. Upon completion you will receive Royal Guardsman Coat of Arms (2x2).
- If you give up or fail the mission, talk to Padan to receive it again.
- Talk to Padan to receive Leymore's Journal (2x2).
- Complete the Taillteann shadow mission, Leymore's Investigation Log.
- You will role play as Leymore. You will start north west of Abb Neagh lake. Head towards the lake.
- It is not necessary to engage in combat with any enemies in the area.
- Elatha will spawn at a random location around the lake, not more than 500 meters away from the shore of the lake.
- Talk to Elatha view a cutscene. You will automatically exit the mission.
- Complete the quest (16,500 EXP) and wait for the next one.
|
Andras and Elatha

|
Name
|
Andras and Elatha
|
NPC
|
Andras
Elatha
|
| Information
|
I received a message from Royal Guard Captain Padan. I understand that you are investigating Shadow Realm. -Andras
|
| Instruction
|
- Talk to Andras in Taillteann to receive Andras's Music Box and the Taillteann shadow mission, Caliburn's Secret. You may use Andras's Music Box to view a cutscene, but it not necessary to progress the quest.
- You will start at the Beacon Mound outside Taillteann.
- Defeat three waves of enemies to open the gates to Taillteann.
- Head to the Steam Ovens outside Alchemist's House (located where Dorren and Eabha are normally found).
- Talk to Elatha for a short cutscene which will complete the quest's objective.
- Exit the mission manually. It will not have any mention of completion.
- Complete the quest (11,000 EXP) and you will receive the keyword, Clue Regarding Goddess Neamhain. Wait for the next quest to arrive.
|
Collect Clues Regarding Goddess Neamhain


|
Name
|
Collect Clues Regarding Goddess Neamhain
|
NPC
|
Hans
Pencast
Lileas
Lezarro
|
| Information
|
You can get clues about Goddess Neamhain from the residents of Tara, the Capital of the kingdom. -Elatha
|
| Instruction
|
- Talk to Hans in Tara to receive Portrait of Neamhain (2x2).
- Talk to Lezarro to receive Lezarro's Inscription (2x2).
- Talk to Pencast to receive Lymilark Scripture (1x2).
- Talk to Lileas, who is located inside the Jousting Arena, to receive the Tara shadow mission, Obtain Shadow Honey.
- You will start at the north entrance of Corrib Valley.
- Although monsters are present, no fighting is required in this quest.
- Look for a tree with a honeycomb and hit it to collect Shadow Realm Honey (2x2). You can use a pet help you gather them faster. The trees with honeycombs have leaves and tiny white flowers.
- After obtaining the 5 Shadow Realm Honey, exit the mission manually. There is no indication of completion.
- Very Important: After exiting the mission you will be given the mission again. If you collected the 5 Shadow Realm Honey, give up the mission so you can be able to receive other missions later.
- Talk to Lileas to give her the honey. She will give you Lileas's Honey Drink. Drink it and watch a cutscene.
- Talk to Lileas again.
- Talk to Eluned at the clothing shop.
- Talk to Lileas, and select "Battle Adair." You will face Adair in a Jousting battle. Win against him in order to proceed.
- See the page on Jousting for more information and tips on how to play.
- You cannot joust him if he is jousting someone else, or if all the lanes are full.
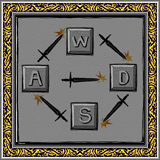
- As a general point of advice, you will want to start with using move A. The important thing to remember is that no contestant can use the same move twice, so when you see what move he made, you can not be attacked from that same one on the next turn. You can play defensively if you look at the moves like a clock and you always choose the next position clockwise from the move that he made. So if he chose D, your next move should be S; If he chose S, your next move should be A, and so on. You will be the most vulnerable when you choose D. If you choose D and get hit, always respond with W and then return to the defensive strategy.
- Talk to Eluned to receive Neamhain's Feather Decoration (2x2).
- Complete the quest (11,000 EXP).
- Once all the clues are gathered, complete the quest (22,000 EXP) and wait for the next one.
|
Goddess's Memorial


|
Name
|
Goddess's Memorial
|
NPC
|
Andras
|
| Information
|
I understand that you collected all the clues regarding the Goddess Neamhain. Elatha is waiting for you. -Andras
|
| Instruction
|
- Talk to Andras to receive the Shadow Mission Neamhain's Memorial.
- You will start outside the east gate of Taillteann. Head to the platform where Andras would normally be.
- Talk to Elatha who is at the front of Andras' platform. A cutscene will occur followed by a conversation.
- Talk to Elatha again to release the barrier to the Taillteann square.
- You will learn novice-rank Synthesis skill if you do not already have the skill.
- Defeat the monsters and use the Dry Oven inside the boss room in the middle of the square. Mix the four items you received earlier (Portrait of Neamhain, Lezarro's Inscription, Lymilark Scripture, Neamhain's Feather Decoration) for a 99% chance to get Neamhain's Memorial (2x2). Do not use the items in Synthesis unless you see that it is a fixed recipe for Neamhain's Memorial Sythesis with 99% success rate. If you are not seeing the fixed recipe, you have mistakenly added a wrong item or are missing an item. Search your inventory for the correct 4 items.
- After successful synthesis of Neamhain's Memorial, exit the mission.
- If you fail the synthesis (1% chance), or otherwise lose one of the items, exit the mission and talk to the four NPCs from the previous quests to receive those items again.
- Use the Neamhain's Memorial to view a cutscene.
- The player can use Neamhain's Memorial before exiting the Shadow Mission above however, no cutscene will appear and the item will disappear. The quest will still progress though.
- Do not talk to Andras again before using Neamhain's Memorial. If you do, you will be given the shadow mission again. If you get it again, give up the mission so you can be able to receive other missions later.
- Talk to Andras to receive the Dark Lord's Token (1x1) and a Waxen Wing of the Blue Goddess to Tir Chonaill.
- Drop the token at Ciar Dungeon's normal lobby to role play as Elatha.
- The dungeon is similar to Ciar Intermediate, it has one floor. There is no boss; just a cutscene when you open the boss room door.
- Complete the quest (22,000 EXP) and wait for the next quest.
|
Book of Tir Na Nog's Doom

|
Name
|
Book of Tir Na Nog's Doom
|
NPC
|
Pencast
|
| Information
|
I want to speak with you about Goddess Neamhain's warning regarding Tir Na Nog's Doom. -Pencast
|
| Instruction
|
- Talk to Pencast to receive the Book of Tir Na Nog's Doom.
- Complete the quest (8,800 EXP) and wait for the next one.
|
The Iria Explorer


|
Name
|
The Iria Explorer
|
NPC
|
Alexina, Castanea, Kirine
|
| Information
|
Iria and Uladh are completely different environments. I think you will need some preparation before you start your exploration. -Alexina
I want to see if you are ready to explore Iria. -Castanea
-Kirine
|
| Instruction
|
- The cubes obtained during this quest will not be stored in your Special Inventory. Make sure to have plenty of room in your General Inventory.
- Depending on your character's race, your quest and required Emblem Cubes will vary.
- Talk to Alexina at Qilla Base Camp.
- Achieve a current exploration level of 3 or above and talk to Alexina again to receive a collection book and a dungeon pass.
- Go to Karu Forest Ruins, drop the pass, and complete the Cube Collection Book by inserting Emblem Cubes.
- The Dungeon is identical to Karu Normal's last floor, consisting of Stone Imps.
- Beware of Stone Imps with "The Dubious" title. They are much stronger than their normal counterparts.
- Rewards for the dungeon remain the same as their normal versions.
- All Emblem Cubes are 1x1 and will only drop from the Stone Mimics found in the dungeon.
- Mimics will almost always spawn in the first and second room of the dungeon. It may be best to get multiple passes and clear those rooms repetitively.
- You will need to collect the following Emblem Cubes:
- Flower
- Human
- Star
- Monkey
- Sheep
- Tree
- Bird
- Snake
- Sun
- Read the completed book and click the button on the first page to collect the reward and receive the Irinid's Ancient Artifact (1x1).
- Return and talk to Alexina in Qilla Base Camp. Manually complete the quest and wait for the next step. [33,000 EXP]
- Talk to Castanea inside the Chief's House.
- Achieve a current exploration level of 3 or above and talk to Castanea again to receive a collection book and a dungeon pass.
- Go to Longa Desert Ruins, drop the pass, and complete the Cube Collection Book by inserting Emblem Cubes.
- The Dungeon is identical to Longa Normal.(?)
- Rewards for the dungeon remain the same as their normal versions.
- All Emblem Cubes are 1x1 and will only drop from the Sand Mimics found in the dungeon.
- It is advised to get multiple passes.
- Mimics will almost always spawn in every room of the dungeon.
- You will need to collect the following Emblem Cubes:
- Spider
- Scorpion
- Sandworm
- Fish
- Rhinoceros
- Lizard
- Read the completed book and click the button on the first page to collect the reward and receive the Irinid's Ancient Artifact (1x1).
- Return and talk to Castanea inside the Chief's House. Manually complete the quest and wait for the next step. [33,000 EXP]
- Talk to Kirine inside the Chief's House.
- Achieve a current exploration level of 3 or above and talk to Kirine again to receive a collection book and a dungeon pass.
- Go to Par Ruins, drop the pass, and complete the Cube Collection Book by inserting Emblem Cubes.
- The Dungeon is identical to Par Normal?.
- Rewards for the dungeon remain the same as their normal versions.
- All Emblem Cubes are 1x1 and will only drop from the Ice Mimics found in the dungeon.
- Mimics will almost always spawn in the first and second room of the dungeon. It may be best to get multiple passes and clear those rooms repetitively.
- You will need to collect the following Emblem Cubes:
- Whirlpool
- Fruit-bearing Tree
- Grounded Bird
- Pegasus
- Reindeer
- Read the completed book and click the button on the first page to collect the reward and receive the Irinid's Ancient Artifact (1x1).
- Return and talk to Kirine inside the Chief's House. Manually complete the quest and wait for the next step. [33,000 EXP]
|
Restoring Irinid's Ancient Artifact


|
Name
|
Restoring Irinid's Ancient Artifact
|
NPC
|
Arenen, Voight
|
| Information
|
I heard that you have a unique artifact. If you need it restored, be sure to bring it to me. -Voight
|
| Instruction
|
- Talk to Voight in Cor to receive the Partially Restored Irinid's Ancient Artifact.
- Talk to Arenen in Calida Exploration Camp to receive Arenen's Engagement Ring.
- Drop the ring at Maiz Prairie Ruins in the Rano region to start a solo Role Play quest.
- The dungeon is similar to Maiz Normal.
- Arenen possesses dual Hooked Cutlass and the skills Defense, Smash, Counterattack, and Windmill.
- If you attack slowly with your dual Hooked Cutlass, you can gain an opportunity for an additional attack. If you did not push away your enemy after the 4th sword hit, you could follow it up with Smash, Windmill, or another Normal Attack.
- Be prepared for a long gaming session. If you play the game optimally, it will still take at least 10 minutes to get from beginning to end.
- Upon reaching the boss room, a cutscene will play. You will exit the dungeon.
- Talk to Voight to receive Ilsa's Handkerchief (2x2).
- Drop the handkerchief at Maiz Prairie Ruins to enter Voight's RP quest. You may bring another player to assist you.
- The dungeon is similar to Maiz Normal. You will be doing the same dungeon you did earlier in the Arenen RP dungeon.
- If you enter alone, you will play as Voight, and Ilsa will accompany you as an AI-controlled NPC.
- The NPC Ilsa deals very little damage, has low HP, and possesses Advanced Heavy Stander. If allowed to be attacked, it is highly likely she will be defeated. Despite this, it is not required for Ilsa to remain alive to complete the dungeon.
- If you have another player accompany you, you will play as Ilsa and your ally will play as Voight. This is NOT recommended because it sets up a dependency where if your ally leaves or is disconnected, you will be unable to complete the objective.
- Voight possess a Beholder's Sword, a Cooking Pot, and the skills Defense, Smash, Counterattack, Windmill, and Charge. Ilsa possess the skills Lightning Bolt and Healing. Both players have the Play Dead action.
- Voight will have to do most of the fighting, because Ilsa lacks basic combat skills and will deal very little damage even with use of magic. Ilsa can grab the attention of enemies and play dead to reduce aggro on Voight.
- It is advised to pick up the Phoenix Feathers dropped by monsters, in case the other player gets knocked out.
- The dungeon will not be completed if your ally disconnects or leaves the dungeon, If you open the boss room alone, you will exit the dungeon without completing the quest objective.
- Be prepared for a long gaming session. If you play the game optimally, it will still take at least 7 minutes and 30 seconds to get from beginning to end.
- Check your inventory. Voight has 3 Movement Speed 40% Boost Potion (10 minutes), which is plenty for the length of the dungeon.
- Upon reaching the boss room, a cutscene will play. You will exit the dungeon.
- Talk to Arenen to receive Rain Maker Crystal.
- Clear the quest (22,000 EXP). Wait for the next one.
|
Rain Maker - Irinid
 
|
Name
|
Rain Master - Irinid
|
NPC
|
Kousai
|
| Information
|
|
| Instruction
|
- Talk to Kousai in Cor and he will teach you the Rain Casting skill and exchange the Rain Maker Crystal for 15 Water Crystals, 5 Wind Crystals, and 5 Earth Crystals.
- Use the skill once. Ranking the skill to F is not required.
- You are not given a Cylinder to perform the action.
- Talk to Kousai again.
- Drop the Rain Maker Arrow onto the altar at Longa Desert Ruins in Connous to enter the dungeon. You may bring a party to complete this quest.
- Note: Kousai will say that this dungeon can only be performed on Samhain (Saturday), but this rule no longer exists.
- The boss is "Possessed Cai."
- Cai's AI is similar to Shadow Alchemists, making it fairly easy to defeat him.
- If Cai is not killed fast enough, he will level up, fully restoring his HP.
- Cai takes much less knockback from Alchemy attacks, and recovers quickly.
- Every party member who is currently doing the quest will finish their quest on completion of the dungeon.
- Clear the quest (16,500 EXP). Wait for the next one.
- Completion of this quest will reward you with a Wings of the Blue Goddess to Tara Stonehenge.
|
Pencast's Call

|
Name
|
Pencast's Call
|
NPC
|
Pencast
|
| Information
|
If you fail or exit the mission, you will automatically receive it. If you gave up the mission, talk to Pencast again to receive it.
|
| Instruction
|
- Talk to Pencast to receive the Shadow Mission Fomor Mata.
- The mission is solo.
- You must defeat a few sets of enemies leading from the north gate of Tara to the Jousting arena. Watch the cutscene.
- You will be introduced to Mata, and you must beat him in a Joust.
- For more information on Jousting, see the Jousting page.
- If you lose, you won't be able to progress any further and must manually exit the mission.
- You will get the shadow mission again upon exit.
- After you win, you must defeat Mata in combat.
- Clear the quest (22,000 EXP) and wait for the next one.
|
Fight for Courcle's Heart

|
Name
|
Fight for Courcle's Heart
|
NPC
|
Padan
|
| Information
|
You may bring a party of 8 on this Shadow Mission. Extra Caution is advised due to the amount of spawns found in each area. Like previous quests, anyone on this quest will also fulfill the requirement necessary to move on into the next quest.
|
| Instruction
|
- Talk to Padan to receive the Shadow Mission Assist the Shadow Realm Expeditionary Force. You may bring up to 7 other players to assist you.
- The mission takes place in Tara. You will start at the south-east gate to the city.
- Entering the city you will encounter a group of enemies behand barrier spikes. You can get to the enemies by simply moving around the barriers by the left or the right. Traverse the town clearing 5 checkpoints held by enemies.
- After clearing the last checkpoint, a cutscene will occur and you will be moved to the center of the city. Numerous amounts of enemies will appear. You will be aided by Andras, Karpfen, Granat, and their troops.
- If Andras, Karpfen, or Granat is killed, the mission fails. If one entire platoon (minus the leader) is killed, the mission fails as well.
- Defeat all enemies. After the battle, a cutscene will occur, and you will exit the mission.
- Clear the quest (22,000 EXP) and wait for the next quest.
|
Courcle's Heart


|
Name
|
Courcle's Heart
|
NPC
|
Padan
|
| Information
|
If you happen to become unconscious, you may resurrect yourself using Morrighan's Protection, up to 3 times. It instantly revives the player on the spot, complete with blessings and full recovery. This option is not available to Royal Alchemists. The only other method of reviving are by the usage of Phoenix Feathers, Advanced Phoenix Feathers and Party Phoenix Feather.
|
| Instruction
|
- Talk to Padan to receive the Shadow Mission Light and Darkness.
- Upon entering the mission a cutscene will occur. After the cutscene, you will face your (or the RA's) Doppelganger.
- For more information on the Doppelganger, read the notes and advices on its page.
- The objective is to use Elatha's Music Box on the Doppelganger when it's taunting you, followed by using Life Drain on it.
- A Cylinder, Alchemy Crystals and 5x Dark Life Drain Crystal are provided by the mission, and will disappear when the mission is completed.
- The Doppelganger will taunt after using Fury of Light. Use the Elatha's Music Box then.
- When the Doppelganger is "writhing in pain", use the Life Drain skill with the Cylinder equipped.
- The player must gain HP from using Life Drain to complete the mission. If the player uses Life Drain at full HP, it will not count for the mission, and the fight will continue.
- The player can lose HP for Life Drain to work properly through Respite, Dorcha Conversion, or by simply attacking the Doppleganger and receiving damage from its Damage Reflection.
- You cannot complete the mission if you have not learned Life Drain.
- Note: There is a bug with Redoubled Offensive and bleeds (such as Sword Smash, etc.) that will bypass Doppelganger's mechanics and kill the boss despite their immunity to regular death.
- For more information, read the Shadow Mission page.
- Once you have successfully used Life Drain, you'll have cleared Generation 10 and be awarded with the Neamhain Demigod skills at rank F: Awakening of Light, Fury of Light and Spear of Light.
- For Royal Alchemists: You will be transported alone without viewing the ending cutscenes.
- Manually complete the quest to claim the EXP (33,000 EXP).
- Fury of Light and Spear of Light are not usable until one clicks "complete".
|
< Generation 9: Alchemist Generation 11: Sword of the Gods >
 Story Contents Story Contents  |
|---|
| | Main Storyline |
| | | Sidequests |
| Chapter 1 | | | | Chapter 3 | | | | Chapter 4 | | | | Chapter 5 | | | | Chapter 6 | | | | Chapter 7 | | | | Arcana | |
| | | Removed Story Contents | | |
 Game Scripts Game Scripts  |
|---|
| | Chapter 1 | | | | Chapter 2 | | | | Chapter 3 | | | | Chapter 4 | | | | Chapter 5 | | | | Chapter 6 | | | | Chapter 7 | | | | Arcana | | | | Other | |
|
|
